Showing posts with label Holiday. Show all posts

5/07/2014

Cinco de Mayo Party

Asher was very excited for Cinco de Mayo.
He is too young to understand what it is about... but the kids sure do love the food and bright colors.
I hope to look up more info about The Battle of Puebla so that I can tell him more about it next year.

We had yummy citrus grilled chicken, refried beans, and restaurant style tortilla chips.
Then the kids asked me to make Peeps ice cream- which was totally in-congruent with the other food:)

Homemade Maracas that got shaken every two minutes during dinner.
They are put away until next year;)


3/13/2013

{Recipe} "End of the Rainbow" Treats


This "recipe" is so simple and quick to make.
I made this treat for Abbie's cousins and Asher's preschool friends.
It only cost $10 for this project...
Especially when using coupons at the craft stores.
I was able to get approx. 9-10 cones with this "recipe"

Supplies-
41 oz. bag of Original Skittles
1 large bag of Rolos Caramels
25 count package Cone Shaped Treat Bags (Hobby Lobby)
Gold Grosgrain Ribbon (Hobby Lobby)
Foam Glitter Shamrock Stickers Package (Joann's)
White Cardstock
2" Scallop Circle Punch
Hole Punch
Lime Green Ink Pad

"End of the Rainbow" Treats
Total Time- 60 minutes or less

Ingredients Per Cone-
2/3 cup Skittles
10 Rolos
1 Cone Treat Bag
6" Gold Ribbon
1 Shamrock Tag

Directions-
Take one cone bag and pour the Skittles in followed by the Rolos.
Punch out the white cardstock with the circle punch.
Ink the edges of the tag and affix the shamrock sticker toward the lower part of the tag.
Use the hole punch in the upper part of the tag.
Take the candy filled cone and do an initial tie with the ribbon.
Before tying the bow, slide the tag into place and complete the bow.
Trim the ribbon to desired look.
Give away to happy kids:)


2/11/2013

{Recipe} Neapolitan Pudding Pie with Vanilla Bean White Chocolate Ganache

This pudding pie is extra sweet, easy to make, and a great little treat for Valentines Day.
The combination of the three layers gives this dessert a Neapolitan Ice Cream flavor.

Oreo Pie Crust
Strawberry Cream Pudding
Vanilla Bean White Chocolate Ganache

I got the Strawberry Cream Jello Pudding for less than a dollar at the grocery store.
It has a very strong artificial strawberry flavor...
Using the other layers really helped to cut into the strawberry flavor which was nice for me.
I am not overly fond of artificial strawberry, but decided to give this a try.
This definitely isn't my go to dessert...
But it was a great experiment that took very little time and tasted good in the end:)


Vanilla Bean White Chocolate Ganache

Ingredients

2 cups Heavy Cream
1 bag White Chocolate Chips
2 cups Powdered Sugar
1 Vanilla Bean, split and scraped

Directions

Heat the cream on medium until little bubbles begin to form on the edges.
Pour over white chocolate chips in a heat safe bowl and let it sit for a couple of minutes.
Using a hand mixer, mix until chips are melted and the mixer is smooth.
Add the vanilla bean seeds and powdered sugar, until smooth.
If it is too runny add a little more powdered sugar, more cream if too thick.
Place in the refrigerator until it firms up a bit.
This makes a lot in one batch, and works to use for a few different recipes.


Neapolitan Pudding Pie

Ingredients

1 Oreo Cookie Pie Crust
1 small box Strawberry Cream Jello Pudding
1 3/4 Milk
1/2 - 3/4 cup Vanilla Bean White Chocolate Ganache
or top with Cool Whip

Directions

Whisk together milk and pudding mix until completely smooth.
Pour into the pie crust and refrigerate for at 1/2 hour or until firmly set.
Lightly spread the Vanilla Bean White Chocolate Ganache over the top.
Place completed pie back in the refrigerator until ready to serve.
*This tasted better the second day after the flavors fused.


2/04/2013

{Craft} Valentine's Wood LOVE Sign


I needed something cute to hang on my door for Valentine's Day.
It is so much fun to celebrate the holiday now that I have kids.

I picked up this pre-cut sign from a local wood shop.
The bead board letters and the heart shaped O were cute touches that made me happy.
I also had the idea to twist the wire into a heart shape, for the part that attaches to the hook.

I wanted the sign to have a weathered look.
So after I glued the bead board on...
I used a fine grit sand paper to remove and brush stroke lines and rough up the edges.
This makes a cute addition to our door...
Plus, it matches the rest of our Valentine's decor.


Click on link below to go to project-

Shabby Chic Key Decor


Miniature Frame Fingerprint Hearts

7/02/2012

Fourth of July Treats and Goodies

I LOVE this time of year.  
Yes it is hot, but I love all of the Patriotic events that go in in Utah during July.
Here is a quick review for the yummy treats I made for our Fourth of July celebration last year.
Be safe this dry and hot season...
Have a blast making memories with your families:)


Red, White and Blue Pancakes
Red~ Fresh Strawberry
White~ Mini White Chocolate Chips
Blue~ Fresh Blueberry


 Patriotic Layered Drinks
Recipe HERE


 Dipped Pretzel Crisps


Fruity Patriotic Popcorn
This will make an appearance again this year


Independence Day Oreo Pops
Grab a pack of the Summer Edition Oreos and some red candy melts...
Then you are set:)


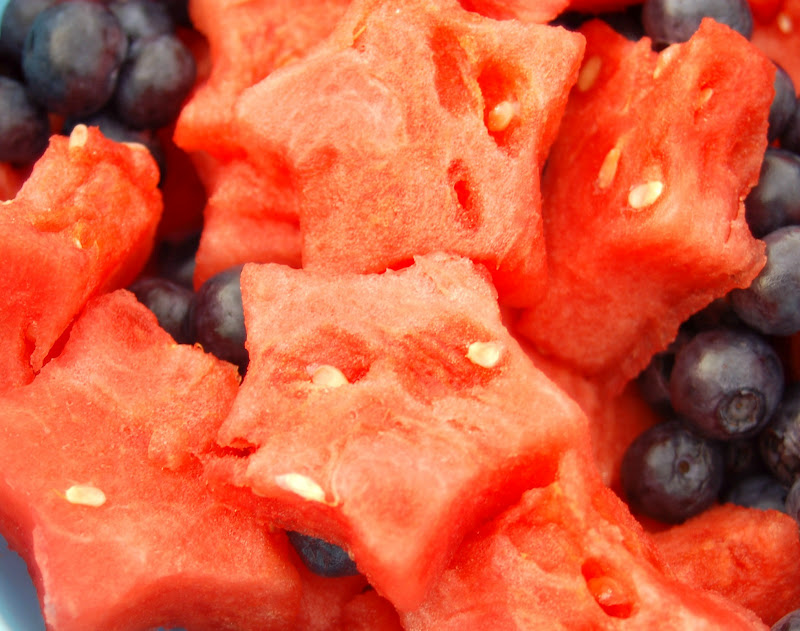
Stars and Berries Fruit Salad

3/14/2012

{Craft} St. Patrick's Day Decor 3 Ways

 A couple of weeks ago, Pick Your Plum had a deal.
Well, they always have a deal, but this one was for St. Patrick's Day potential.

I have NO decor for the Day O' Green,
In fact, THIS was the first thing I have done in regards to the holiday. 

Back to the deal...
I was able to get 9 Mini Wood Shamrocks and 3 Large Shamrocks for a steal.
When I saw the deal, I immediately let Katherine from Irish Italian Blessings know.
From her blog name alone, you can tell that she digs this holiday.
Hop over to her blog and see her super cute crafts she made with the PYP deal.

All three of these projects were made with stuff I already had on hand...
so the only thing I had to purchase was the Shamrocks.
It was three easy projects that got rid of some of my craft stash.

Shamrock Pennant Banner


Ever since I saw THIS and THIS
I knew I wanted something similar.


Square Shamrock Wreath


Clouds and Rainbows Felt Garland

I now feel that we have sufficient decor this year, and that we can easily add to it next year.
Maybe I should take my Valentine's Day stuff down, 
So that only one holiday is up at a time:)

3/12/2012

{Recipe} Minty Pot of Gold Pops

This is the post I did last week over at Lil' Luna

Around our house, we are big fans of Oreo Truffles...
Not just because they taste good, 
But they are easy to make, and easily customizable for every whim:)
We never really celebrated St. Patrick's Day at our house before.
Since we love rainbows, and the color green...
I figured it was about time to remedy that:)

Pot of Gold Pops
Yields Approx. 13 large Pops or 26 small Pops

30 Oreos, pulverized
8 oz Cream Cheese
1+ cup Guittard Mint Chips
1+ cup Black or Chocolate Melts
1 Tablespoon Vegetable Shortening, for thinning
Gold Sprinkles
Sucker Sticks


Directions

*Break the 30 Oreo cookies into pieces and pulverize in a food processor.  
Mine is about the texture and size of corn meal.
*Mash the softened cream cheese with the cookie crumbs until well incorporated and no white remains. 
*Line a small pan with wax paper.
*For the large pops, scoop 2 Tablespoons, form a ball, and place on wax paper.
*For the small pops, scoop 1 Tablespoon, form a ball, and place on wax paper.
*Place pan in the refrigerator for 30 minutes.
*Melt five of the chocolate melts and dip the sucker stick tips in, then place one in each ball.
Chill for two minutes.
*Melt the Mint chips at 50% power in 30 second intervals, stirring until melted.
*Slightly flatten the balls, then dip them in the mint melts, lightly tapping the excess on the side.
*Place the sticks in some kind of base to harden.
*Melt the black melts and the shortening in the microwave in 30 second intervals.
*Dip the balls in the melts so that they are now double coated.
*Put some of the black melts in a ziplock bag, snip a small corner and pipe on the cauldron rims and handles.
*Fill the "top" of the cauldron with a scarce amount of melted chocolate, then immediately pour the gold sprinkles.


It seems like a lot of steps, but if you have your space cleaned and cleared...
and everything on hand, it will move fairly quickly.

These treats are perfect for my little leprechauns and their daddy.


Reality Check-
I like my Oreo Truffles smaller, so that there is a more even ratio of crunchy outer shell to filling.


You can change this recipe up and use Thin Mints, Mint Oreo, Raspberry Oreos, Vanilla Oreos.


If you use a different flavor of Oreo, don't use the mint chips... just double dip them in the outer coating.


When you take pictures, make sure there is lots of natural light if you can help it, and shoot in odd numbers.

Enjoy, and have a pinch free St. Patrick's Day:)


Linking to~ Two Yellow Birds Decor, Cupcake Apothecary

2/06/2012

{Craft} Valentine Ombre Heart Decor

I haven't really ever had Valentine's decorations.
I never really liked the holiday until I had kids.
Now it is a lot more fun...
So I wanted decor to make the holiday more exciting for the kids.
The color palette I am going for is Faded Brown/Tan, various shades of Pink, and White.
My first decoration can be seen HERE...
Below is the second...

 The Valentine Ombre Heart Frame


I have seen these ornate picture frames all over the blogosphere. 
I wanted one to add to my own collection...
So when Hobby Lobby had them on sale for 50%, I got one.

This project only cost me the price of the frame.
The paint chips I used for the hearts were free, 
I borrowed my Mom's off-set heart punch,
And used chipboard I already had on hand.

The greatest thing about this project is...
I can use this frame for multiple holidays/decor.
Hearts, 
Snowflakes, 
Autumn Leaves, 
Easter Eggs,
Baby Showers...
A very versatile project.

The Ombre Hearts are easy to put together.
Use the paper punch and paint chip strips...
Tape them to the chipboard using glue dots...
Slip the chipboard into the frame...
And you are ready to go with your custom decor.

1/09/2012

{Project Kid} Retro Inspired Paper Dolls

A month or two before Christmas, as I was browsing Pinterest, I found a pin for Retro Paper Dolls.
Not just any Paper Dolls, but Disney Princess/Prince Paper Dolls.

The artist is named Cory Jensen, and he has quite a lot of talent.
CLICK HERE for the link to the beginning of his gallery.

There is a wide variety to see, though not all of them are available for download.
There are also artistic images, not just paper dolls.

He has done Phantom of the Opera, Wicked, Kate Middleton, Aida... 
I love the Belle, Ariel, Snow White, and Tiana paper dolls...
There are so many awesome options.
What's even better is the fact that it cost me nothing.  

I downloaded...


All I had to do was pay a couple of dollars to get them color printed on cardstock at Office Depot.
I cut them out, laminated them, cut them out again, attached Velcro, and had them waiting for the Abbie in her stocking.

Abbie really likes them. 
She always tells me that I need to be "Mother Gofel" and then I have to sing in the creepy, get her hair to glow, voice.

If you want to give unique, affordable gifts... this is perfect.
They are also easily replaceable when they get worn out from lots of playing.
Go check Cory's Gallery out and enjoy:)

1/01/2012

{Recipe} Cabbage Burgers and Happy New Year

Last Week I Guest Posted over at One Artsy Mama, I love her blog and all of the great projects she does for kids.  She asked me to post about a holiday tradition and I chose one of the best.

Growing up, New Years Day was always one of my favorite holidays.  
New Years Day meant Cabbage Burgers.  
It is the only day of the year we get them, which makes them taste extra good.  
For the first time in my 27 years of life I have broke the tradition and made Cabbage Burgers early, so that I could take a picture for this post.

The legend for New Years Day is...  however much cabbage you eat on the first day of the year, that is how much fortune/prosperity you will have in the coming year.  
We eat Cabbage Burgers, 
Homemade KFC Coleslaw, 
and yummy Oriental Cabbage Salad.  

A southern tradition is to also eat as many black eyed peas as you can for luck.  
My great grandma who originates from Louisiana, brings those every year.  
I don't need luck that bad, because those are not my favorite:)  


When most people hear about cabbage burgers they're like, "What is that?" 
 I think it comes from Germany, though my heritage is French, so who knows how it came about... as it was pointed out to me this week, it makes sense that it most likely originated in Ireland.
 
When people hear about it, they are skeptical until they try it.  
My mom got the recipe from my dad's side of the family and it has spread to multiple family members now.  Now I spread it further by sharing it with you.


Cabbage Burger Recipe

A double batch of Homemade Bread Dough rolled out 1/4 inch thick and cut into 5x5 inch squares
1 large + 1 small head of Green Cabbage- shredded
approx. 2lbs Ground Beef
1 medium Onion- minced
Salt and Pepper to taste

Makes approx 30 burgers

Drop the ground beef and minced onion into a large stock pot and start browning the beef and onions. 
 Do not drain.  Start adding cabbage until it reaches the top of the pot.  You probably won't be able to fit all of the cabbage in at once, so wait until it cooks down, add the rest until it all fits.

After everything has been in the pot for about an hour on medium heat you are ready to add it to the bread dough.  Roll it out 1/4 inch thick and cut it into 5x5 inch squares.  Place a spoonful of the cabbage mix in the middle of the dough square.  Pull all of the sides up and pinch it in the middle so that no filling falls out.  Flip the burger over and bake at 350 degrees until the bottoms of the burgers are browned. 
 I start checking at about seven minutes on my oven.  As soon as they are browned pull them out and butter the tops.  Let it cool for a couple of minutes then dig into the deliciousness:)

My mom and I use homemade dough, but to simplify, you could totally use Rhodes Rolls and Cole Slaw Shredded Cabbage bags.
These may just taste ordinary to you, but they are special because I only get them once a year. 
May you have a 
Happy New Year 
filled withProsperity and Luck in 2012.

12/19/2011

{Guest Post} Katherine from Irish Italian Blessings

Today we have a special Christmas Traditions Guest Post from one of my favorite bloggy friends.
Katherine from Irish Italian Blessings.
Katherine writes in a way that can make you laugh, cry, ponder, nod your head in complete agreement...
Head over to her blog on THIS POST to see my Traditions post.

Thanks so much to one of my most favorite bloggers ever, Amanda, at Joy in the Jumble for allowing me to be a guest poster for her today! She shares my incredible love of Christmas and I am so excited she is going to be sharing with my readers today too!

I'm Katherine, blogger of Irish Italian Blessings, and I looooove Christmas. I love everything about it. I listen to Christmas music starting on Thanksgiving, I have more decor than I know what to do with, and my schedule becomes a non-stop craziness awesomeness with a Christmas theme.

Today, we're talking about TRADITIONS! One of the reasons I love the holiday so much is because of the traditions.
The first year I met my husband, way back in 2002, we decided to head to San Francisco and drive around to see all the Christmas hustle and bustle.

We went down to Pier 39 first to see the tree, it's beautiful, and tall, and there's always plenty of people if you're looking to people watch.
Our next stop was Union Square to see the Christmas Tree
(yes, I know I might sound slightly obsessed with Christmas Trees)
There is something truly magical about Union Square, the Macy's covers it's windows with lighted stars or snowflakes and the Saks Fifth Ave does the same.
I'm pretty sure Santa lives here.
People are shopping, singers are singing, everyone wearing their winter coats and sipping their coffee. Just being there gives me the feeling of Christmas!
This picture does it a little more Christmas justice, forgive my tree pic, it was taken pre-totallyawesomeDSLR-days

Finally, when we'd almost had enough Chrismas cheer to fill us up, we headed down to the embarcardero ice skating rink.
 We got a nice cup of hot chocolate and watch the ice skaters.
The first year for my husband and I was so amazing, so incredible, and so magical that we made it OUR first tradition. It never feels like Christmas until we do our San Francisco trip.
Of course now that we have babies it's not as easy but if you haven't had the chance to do a San Francisco Christmas, you must put it on your bucket list, it's a tradition you'll never regret starting!

Thanks again to Amanda for hosting me today! If you want to see more of my Christmas Cheeriness, please come visit and say hello!

Thanks for sharing this amazing tradition, and awesome memories Katherine.
I LOVE San Francisco, would would enjoy going there at Christmas time, since I have only been there during the summer.

12/14/2011

{Photography} How to Create Heart Shaped Bokeh with Christmas Lights

Last night the kids and I were playing in the living room.
All the lights were off, except for the Christmas Tree.
We danced, they climbed, I tickled, we all giggled.

I saw an awesome tutorial on Pinterest, about how to get beams of light to come off of your twinkle lights.  I thought I pinned it, but I can't find it anywhere. I wanted to give proper credit, but alas, I can't. Pinning FAIL.  There are a bunch of tutorials HERE, containing the same concept for the tree shots I got toward the end of the post.

For the heart shaped bokeh, I did my own thing. 
 I AM NOT A PROFESSIONAL PHOTOGRAPHER.
I tinker, so that I can learn.

There is an article linked to THIS PIN, but I didn't read it, so I don't know how they did it.
I know how I did it...
1 3x3 square of white paper with a small heart cut in the center.  
I did four different versions until I finally found the one the worked for me.  The first one I did was too big and made all of my twinkle lights look like Pac Man:)
I used my tripod so that everything was more stable.
I worked in Manual Mode
Aperture or F-stop set to f22 
Shutter Speed set to 25
ISO set to 1600
I took the camera off of auto focus (AF) and switched to Manual Focus for more control.
After taking different shots, I stayed in these camera settings and put Auto Focus back on for the tree shots below.
It was fun to tinker and test this concept... and to have it actually work:)
Pretty much the only editing I did to the shots was to airbrush the ISO pixilation out, and brighten it up from the airbrushing.  I love how all of them turned out.


This bokeh shot taken without the heart filter on.


12/13/2011

{Project Kid} Glow in the Dark Ornaments PLUS 5 Other Styles

This entire project cost me $2.50 for the six pack of ornaments.
Everything else I had on hand.
Cheap, handmade, silly...
Not too bad:)
 This was Abbie's favorite ornament.
She kept running to turn off the lights while I was painting other ornaments.
All I took was the clear glass bulb, poured in the glow in the dark paint, and swirled it around.
Abbie can't wait to hang it on the tree.
The glow doesn't last long, but she doesn't care because she ropes me into holding next to the light every time:)


Red and Green Nail Polish Marbling 
Inspiration and tutorial found HERE by my Bloggy friend Katherine

 I should have used a larger bowl for better coverage.  As it happened, I had to rotate and dip mine multiple times for complete coverage, and I damaged some of the polish in the project.  
It was a fun experiment, and Abbie loved watching/helping.


 Abbie's Snowman prints were painted with pink, and she wiggled her fingers around so hers are huge.
Asher's are blue and green and I could barely get paint on his fingers before he started to spaz out.  His are small and sparse.
 Inspiration found via Pinterest.
Tutorial HERE


 I love how the Epsom Salt "Snow" Ornament looks.  It is a little messy, but worth it.
Inspiration found via Pinterest
Tutorial HERE
I used thick Mod Podge instead of a glue stick


 Peppermint Candy Ornament.
White Paint poured and swirled inside, red stripes painted outside.
I don't like the Matte finish of the red, so I think I am going to go back and paint over it with an iridescent pearl. 


 Red with Green Glitter Polka Dots
Red paint poured inside, dots of Mod Podge covered in lime green glitter