Showing posts with label Photography. Show all posts

1/06/2012

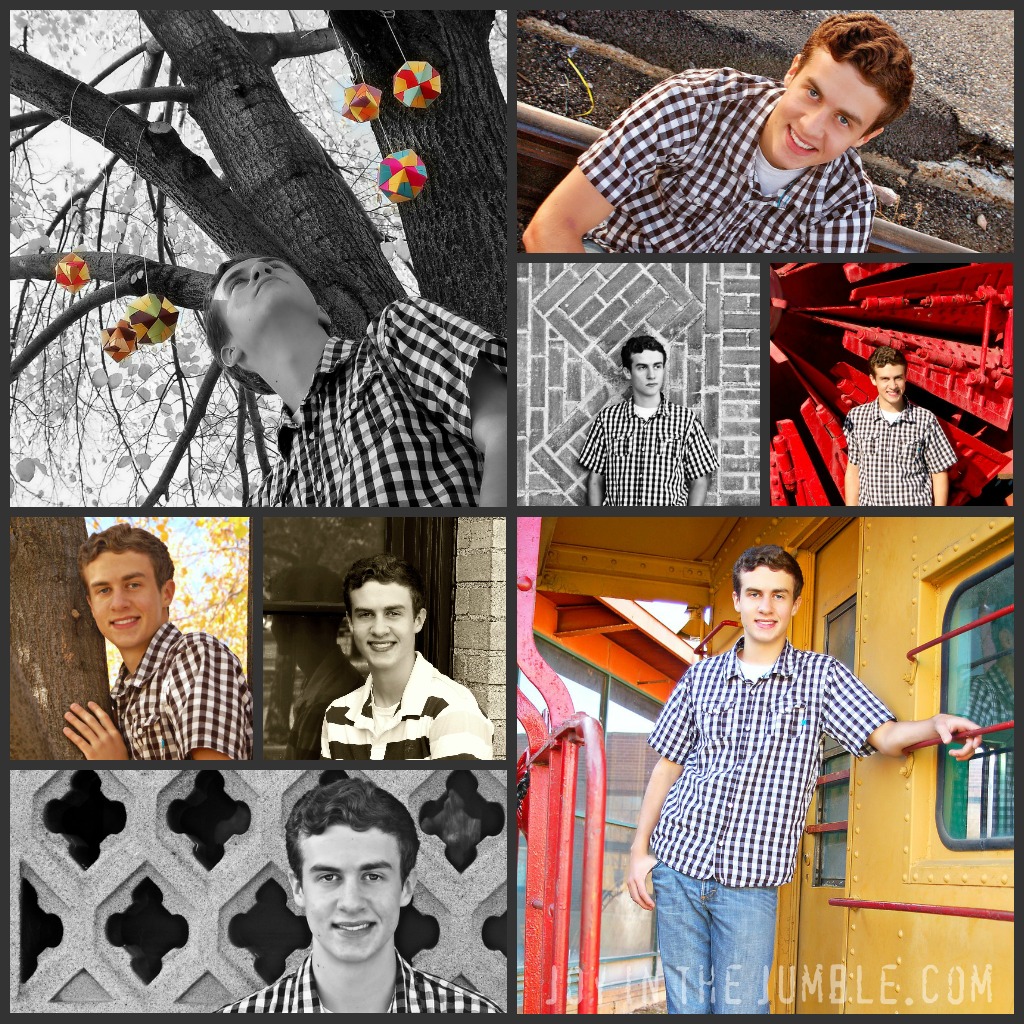
{Photography} Senior Picture Photo Shoot- Blake

Last Fall, I was asked by Blake, to use my amateur photography skills and take his Senior Pictures.
Blake was on Pioneer Trek with us.
He was one of our "Step Son's" since he and a bunch of other kids were always over with our Trek family.

We still get to see Blake semi-frequently, as his older brother and his wife are our friends and neighbors...
or when a bunch of our Trek Kids/ Step Kids pull pranks on our house at 10 pm and stay to laugh until midnight... Good Times, Good Times:) 


Blake is an awesome and talented kid.
 I have had so much fun talking with him.  
He reminds me a lot of my brother in personality...
and the fact that we like the same stuff, just like my brother.
Abbie really likes Blake, and can't help flirting with him. 
(How is is going to be when she is a teenager... shudder!)  
She met him at the end of Trek, but didn't really get to know him, until Blake and his family joined us for Fourth of July Fireworks.
She had to sit with him for fireworks, play with him and his nephew, her "best friend", Hadley.


I am glad that Blake gave me the opportunity to photograph him, and hone my skills.

12/14/2011

{Photography} How to Create Heart Shaped Bokeh with Christmas Lights

Last night the kids and I were playing in the living room.
All the lights were off, except for the Christmas Tree.
We danced, they climbed, I tickled, we all giggled.

I saw an awesome tutorial on Pinterest, about how to get beams of light to come off of your twinkle lights.  I thought I pinned it, but I can't find it anywhere. I wanted to give proper credit, but alas, I can't. Pinning FAIL.  There are a bunch of tutorials HERE, containing the same concept for the tree shots I got toward the end of the post.

For the heart shaped bokeh, I did my own thing. 
 I AM NOT A PROFESSIONAL PHOTOGRAPHER.
I tinker, so that I can learn.

There is an article linked to THIS PIN, but I didn't read it, so I don't know how they did it.
I know how I did it...
1 3x3 square of white paper with a small heart cut in the center.  
I did four different versions until I finally found the one the worked for me.  The first one I did was too big and made all of my twinkle lights look like Pac Man:)
I used my tripod so that everything was more stable.
I worked in Manual Mode
Aperture or F-stop set to f22 
Shutter Speed set to 25
ISO set to 1600
I took the camera off of auto focus (AF) and switched to Manual Focus for more control.
After taking different shots, I stayed in these camera settings and put Auto Focus back on for the tree shots below.
It was fun to tinker and test this concept... and to have it actually work:)
Pretty much the only editing I did to the shots was to airbrush the ISO pixilation out, and brighten it up from the airbrushing.  I love how all of them turned out.


This bokeh shot taken without the heart filter on.


12/12/2011

{Recipe} Hot Chocolate Rice Krispie Treats


Hot Chocolate Rice Krispie Treats

7 cups Rice Krispies or Cocoa Krispies
16 oz Mini Marshmallows or 16 oz large Mallows cut in half
7 T Butter
1/2 cup Stephens Milk Chocolate Hot Chocolate Powder
1 cup Dehydrated Marshmallows, optional

Melt butter in a pot on medium heat.  Add hot chocolate powder and mallows, save the dehydrated for the end.  Stir until mallows have melted and is smooth.  Pour over rice krispies in a large bowl until everything is evenly coated.  Add the dehydrated marshmallows and pour entire mixture into 9x13 pan.

Hot Chocolate Frosting

3 T Butter
1/2 cup Shortening
2/3 c Hot Chocolate Powder
1/2 c Cocoa Powder
1-2 cups Powdered Sugar, I did 2
1 t Vanilla
Milk to desired consistency

Cream the butter and shortening, then add vanilla.  Add the rest of the ingredients, pouring a little milk at a time, until mixture is well incorporated and smooth.  Immediately spread onto rice krispie treats and top with fun Christmas sprinkles.

Notes:
The frosting has a slight crunch to it due to the undissolved hot chocolate powder... I like it.
It will have more of a chocolate flavor if you use cocoa krispies... I didn't have any.
I didn't use 16 oz of mallows.  I only used 10 oz, and they dried out before the end of the night.  I think Rice Krispie Treats should be GOOEY, so I bumped up the mallows to 16 oz. I will be making it that way next time.

12/05/2011

{Party} Eggplant Purple, Willow Green, and Cream Wedding

I posted about the first wedding I did HERE

These weddings were a week apart, and were vastly different in style, cost, and building location.
I loved the opportunity of working on both.

This Bride, Alyssa, is Matt's cousin... and very artsy.
We had lots of different idea swirling around, and it came together great.
Her colors were Eggplant Purple, Willow/ Olivine Green, and Cream.

Her centerpiece flowers, bouquet, and cake flowers were all made out of paper.
I made the centerpieces, and the bouquet and cake flowers came from Flowers From The Garden Shop on etsy.  Candace did a beautiful job on the bouquet... the crepe paper roses looked like real petals.

Matt's aunt and uncle are very talented and make the wedding cake for all of the niece's and nephew's, as a wedding gift.  This was my first time placing flowers on a cake, and I was so nervous.  There is no going back, and these were little paper flowers; not big fresh flowers that could hide a mistake:)

The refreshments were Gourmet Donuts from Beyond Glaze
The flavors were
Raspberry Mango
Chocolate Ganache
Maple Madness
Cookies and Cream
Blueberry Bliss

The drink was Hot Chocolate served with mini marshmallows, chocolate covered peppermint sticks, and my homemade vanilla bean whipped cream.

The archway decorated with rustic grapevine, twinkle lights and flowing fabric.

My pride and joy was the ceiling.  This picture does not do justice to how awesome it was.  This shot is with all the lights up, rather than dimmed. 
It was amazing to see the exact picture in my crowded and imaginative brain, come to life.
I had great help from the friends of the Mother of the Bride, to execute this endeavor.
I took a cream hula hoop and attached the gorgeous organza to it.
I also attached mini wrought iron buckets with matching purple and green satin ribbons.  We then completed the chandelier effect by stringing 300 one inch round mirrors and hung the entire apparatus around the center dome light.
With the lights dimmed and the twinkle lights doing their job of twinkling...
It was like walking into shimmery moonlit garden with diffused warm glow overhead and tiny flowers and birch twigs below.

There were other small touches I didn't get a picture of...
The bride and groom found an old door and painted it rustic and turned it into a picture wall.
The Mother of the Bride quilted a gorgeous bed spread that matched the wedding colors.
The little wrought iron birdcage for gift cards.
The wrought iron lanterns leading guests up to the entrance.

There was dancing, live music, cake all over the walls from the bride and groom.
I was afraid we wouldn't get to do a proper send off with the sparklers, because the snow was coming down so hard... but it worked:)

It was A LOT of hard work...
It turned out great and was worth the effort!

11/02/2011

{Photography} Photography Workshop with Holly Hyde and Mindy Black

There is an awesome Photography Workshop I found out about last month.  It is an amazing deal, but I just don't have the money because I am going to buy a new 50mm lens.  I found out today that Holly is giving away one seat on her blog.


I want to win this so badly, and I hope it works out the way I want it to.  I have never met Mindy, but Holly takes amazing photos. I can't wait to get our family pictures back shortly:)

This workshop is in depth and will help me expand on the class I took in March.  Visit the link and check out the amazing things you can learn... but leave the entering of the contest to me;) Just kidding... good luck to all who enter.

8/05/2011

Say NO to Auto

Kristen of Kristen Duke's Photography has an ebook, that she just revised to add more information... for the same awesome price...
Only $10...
$10 to help you take better pictures.
This ebook gives you tips and pointers for moving away from the AUTO button and moving toward the awesomeness that is MANUAL mode.

It is hard to figure out everything on your own, and I love how Kristen set up this book.  The pictures she printed in the book have the settings she used for each shot.  She is also super helpful in answering questions:)

She hits the main points for beginning photography...

Shutter Speed
Aperture
Lighting

Click on over to Kristen's site.
Order the ebook
Take control of your camera!


FTC Disclosure- While I did purchase the original version of Say NO to Auto, I am receiving the revised addition for this post at no additional cost.  The opinions stated above are my own, and I back them and Kristen 100%

7/11/2011

{Party} Blue & Black Wedding

Here are the cupcakes I got hired to do for a wedding.  
The Bride's colors were Black, Malibu Blue (Turquoise/Teal), and Silver.
The colors all came together nicely.

I used my homemade Chocolate Cake Recipe and made 9 dozen cupcakes.
Then I frosted the cupcakes using THIS teal tinted recipe like I did with Mother's Day Brunch in white and the Pinkilicious Party in pink.
I alternated the styling of the cupcakes between
Silver Foil Cupcake Liners and Black 4mm Edible Pearls and
Black Foil Cupcake Liners and 4mm Silver Dragees
(The Silver Dragees were my favorite with the teal tinted frosting)

I loved the tinted frosting compared to the white buttercream I did for the Bridal Shower. The bride was pleased... I was pleased... and better yet I got paid to do them:)


Some of the decor for the wedding that was being set up while I placed the cupcakes on the stand.  The backyard was gorgeous, established, lush, and ideal for the festivities.
Hanging Tea Lights for when the sun went down, and the rainstorm rolled in.
Backdrop for the bride and groom to stand in front of during the ceremony.

Table decorations with gorgeou mirrors to reflect the leafy canopy overhead.

The delicate silver bows tied to the crisp white chairs.

Ornate Lantern at the Guest Sign In table

7/06/2011

{Party} Pinkalicious


My cousin's little girl Kadence celebrated her 5th Birthday this past weekend.  She wanted a Pinkalicious Party after the book, and her mom spent a couple of months preparing for the party.

 Her parents did a stupendous job, especially considering that her mommy was in a car accident and broke her kneecap a couple of days before the party.  Kadence was a happy girl with all of the effort her parents put into her party.

I helped by making 6 dozen cupcakes for the party.  She wanted them super PINK, so I obliged:)


Her parents put together a bunch of fun party favors and treats for the kids.


David and Leanne even put together cute bags of treats to rid yourself of Pinkititis, like in the book.

Leanne had my Aunt Barb read the story to some of the younger kids at the party.  I had never heard of this book, but both of my kids thought it was fun and silly.


Asher was so excited to finally be able to eat a cupcake.  These cupcakes were so pink, it made Abbie's diapers Pinkalicious for the next two days:)


We got to the party before everyone else to set up the cupcakes and help with anything else.  That meant that Asher, Abbie, Kadence, and Shelby got to play on the bouncy slide before everyone else got there.
This is the Birthday Girl's little sister Shelby.  Shelby was just as excited for Kadence's birthday as she would be for her own... she was so cute.
The three girls together

Look at the angle of Abbie's feet in this picture... this was right before she did an awesome face plant, then got back up for more:)

All of the kids had SO MUCH FUN!  Asher played so hard, that he actually got sweaty.  Both of the kids slept so well that night.


Asher and Abbie both catching some serious air.

 
The kids also loved the balls at the bottom of the slide, though my kids called it popcorn... I guess we will never have normal names for things;)
David and Leanne did such an excellent job.  Every kid at the party had a blast.  It got so hard to take pictures of everybody because there were so many kids moving, dancing, and jumping around:) All Asher can talk about is having a bouncy slide when he turns five NEXT YEAR. 

6/15/2011

{Photography} Blooms

There are were many pretty blooms around our house this weekend.  I was given this gorgeous cobalt blue vase, with lilies, hydrangeas, roses, and awesome blue flowers, at my grandma's funeral.  I transported them home so that I could press and dry some to the blooms for a future endeavor.

I love the colors the florist chose.  The blues remind me of a fancy blue floral dress my grandma had:)

We have this HUGE bush in the backyard that looks like it is raining white blooms.  The heat of the summer wilts the little white flowers pretty quick, so I wanted to get a picture before it was too late.

I love the Bokeh effect in this picture.  If you click on the picture to view it larger, you can see the little blue bug that landed in the top left section of the picture.  My kids, especially Abbie, are obsessed with bugs right now.

Our neighborhood has scattered poppies all over the place.  I love how vibrant they are, and I REALLY love that the weather has been good enough for them to grow:)